 |
| From Albuera |
Showing posts with label Wargames. Show all posts
Showing posts with label Wargames. Show all posts
Friday, 30 December 2011
Battle of Albuera
A re-fight of the Battle of Albuera at Matt's using the 'In The Grand Manner' rules. This was one of the bloodiest battles that the British ever fought in.

Monday, 16 August 2010
Spanish Smash
Round to Matt's for a game of 'In The Grand Manner' his favorite set of Napoleonic rules. Set in an undisclosed place in the Peninsular (Iberian not Furness), the French have launched a surprise attack against the allied flank. The Spanish forces had been given the job of holding a farm on that flank, or, given the disparity in the sizes of the forces engaging, at least delaying the oncoming French advance.
 |
| From Peninsular '10 |
Sunday, 20 September 2009
Uncharted Jabberwocky
A big multi-player game of Uncharted Seas on Saturday, hosted by Jabberwocky Games to celebrate 'International Talk Like A Pirate Day'. Starter fleets only due to the large number of first time players. A bit chaotic trying to keep things in sync as people wandered around and other spectators asking questions, plus a noisy kid shouting out the same things repeatedly as if you couldn't hear him the first time (why didn't the pirates keelhaul him?)
My elves were put on the left flank and given the job of taking out a Bone Griffon fleet. First time I've played against them but I had already heard about their perceived deadliness at range. Also no Star Cards in this game which knocked back the elves due to the negation of their magical trickery.
The sides line up
with the 'bad guys' winning initiative and moving first.
 |
| From Uncharted Seas |
from bottom to top...
'Good Guys' (right)
Thaniras Elves
Iron Dwarfs
Thaniras Elves
Bone Griffon
Dragon Lords
vs
'Bad Guys' (left)
Bone Griffon
Shroud Mages
Shroud Mages
Bone Griffon
Imperials
Fortunately all the troublesome Orcas were placed on one side with an island separating them from the rest of the fleet, so I had a pretty much unobstructed path towards the cruisers and the rock chucking battleship with my own cruisers and frigates, and the bonus of a couple of isles to shield my battleship as it moved forward.
Split the Kipper
risking going out of control radius.
 |
Didn't have to worry to much about being out of command as the lead cruiser soon slide beneath the waves. The other cruiser was soon decrewed as well.
After a disastorous ramming attempt by three Orcas, that resulted in them getting wiped out, I finally managed to get my battleship in close range of his. Since it was an all trebuchet layout I had only the plague gun to worry about. Even with some crew damage my ship was still able to put 14 dice of shots into the undeads ship. The opposing player was a bit disappointed that he didn't get both the trebuchet and broadside dice to play with, if he had known I don't think he would of been so keen to bring it so far forward. I don't recomend the Bones for a first time player, too many extras to take into account, best to get the basics nailed first.
Just before the rake
speed bump frigate to stop his turn.
 |
Some how the opponent managed to get his battleship stuck against the edge of the world and my frigate effectively locked it in place for a turn. With his one remaining cruiser sailing away and being harassed by my other remaining frigates, and his other squadron of Orcas being dealt with by the neighbouring dwarfs there was no rescue for the big ship.
And with time running out and people having to run off, the game was declared as a narrow good guy victory, primarily due to the taking out two of the bad guys battleships in the final turn.

Monday, 31 August 2009
Minas Tirith
Another old post transfered over.
January 2006
From Tuesday:
So how do you defeat a charge by the Rohirrim like what happens in the movie? Simple, line up your Trolls and Mumakils and watch the horses bounce off. You can then kill any Hobbits and cross-dressers at your leisure.
This game played was based upon an old SPI game from the 70s. An almost direct conversion, but instead of counters we used minis on an hex based table top. The actual walls of the city actually looked quite neat being made from components of a block stacking game based upon the Leaning Tower of Pisa!
We lost in the end, apparently even in the original game it was almost impossible for the bad guys to win. maybe it was because I spent to much effort in trying to kill off the main characters. Didn't think much of the map layout either, with no outer ramparts to the Pellenor, and hills scattered around the place.
On thing I might of done is convinced then to do 'The Battle of Un-Numbered Tears' which appeared in a wargame mag over 10 (nearer 20!) years ago.

Wednesday, 22 July 2009
SA-80 Monarchy
No club on Tuesday due to a meeting in the Hall, so a small gathering at Matt's to try and finalise the rules which appear to of morphed into 'SA-80 Monarchy'. Unlike the club drinks and cake was provided; Thanks Matt.
The unit list has expanded a lot but still no stats for Routemasters, so how militia are suppose to get around I don't know.
Played an unconventional (for AK-47) 2 vs 2 game with equal point forces on an over-sized table. Lots of tanks and mobile units on the board.
Much querying over the effectiveness of artillery as it did seem powerful as it could standoff and blow the toughest tank apart with some ease. We didn't play the official encounter rule so it was more like a conventional wargame with forces and reinforcements approaching from two sides, rather than AKs more usual popping up at a chosen corner or side. This gave the guns a lot more security than what they would normally have.
Despite this the guns are being tuned down a bit.

Sunday, 12 July 2009
Jabberwocky Jappers
Phil's games store has finally opened in Ulverston. Jabberwocky Games is no longer just a website, but is the first dedicated games shop in Furness since System Games in the early 90's. A bit of a brave thing to do given the economic climate.
 |
 |
Finally broke and went on a bit of a spree. Bought the Uncharted Seas revised rulebook and Thaniras Elves starter fleet (with free blister pack), and the Race for the Galaxy boardgame. Also got an opening day discount and a free pair of Jabberwocky dice!
The Uncharted Sea stuff was selling quick and along with Flames of War probably made up the majority of sales. Seas definitely seems to be the in thing at the moment. Graeme was demoing it at the back of the room in sauna like conditions.
 |
Somehow, despite a poor fantasy round, the FW team managed to win the Sci-fi\Fantasy quiz gaining Jabberwocky tee-shirts in the process. I was surprised that I was the only one on the team who knew who Thulsa Doom was. And also the only one to recognise the funky first series theme tune for Space1999. What is this and other worlds coming to.

Monday, 5 January 2009
Two Far Bridges
An Arnhem style WW2 Airborne landing by the Allies. Played on Friday at Matt's using the Flames of War rules. Phil, Jock and myself turned up with Phil playing the defending Germans. The Allied forces consisted of British and American Paratroopers, as well as Glider-borne artillery and motorised scouts. The airborne landing had to be split into two waves and the decision was made for the first to go in before dawn despite the risk of losing troops in the drop. Since there was no formal rules for drops in the books that we had, the old\traditional 'paper chits dropped from height' rule was used.
 |
| From Flames of War |
A view of the combat zone. Both bridges need to be taken and held till reinforcements (hopefully) turn up at the near edge.
Drop Zone

The first choice of drop zone, between the bridges but near trees and a built up area, turned out to be a bad one as the landing was opposed by two groups of Jerries, including a Luftwaffe ground unit holed up in the buildings near the first bridge. The paras did a limited amount of damage before being removed; An enemy Forward Observer being a particular nuisance by calling fire down on them.

The troop from the second drop zone were more successful and attacked and seized a position near the second bridge, despite coming under intense fire from across the river they managed to dig in.
Glider Landings

A fairly conservative and safe choice for landing zones for the Gliders. Given that the vast majority of this force was mechanised being dropped this far from the action was not thought to be a problem. The landings were semi-successful but we did manage to lose the only 17pdr gun so there was the potential for trouble if enemy tanks did turn up.
Second Wave

Four turns after the first the second wave of British paratroopers arrive and land in relative safety between the two bridges unopposed by the defenders.
American Landing

A risk was taken with these and they dropped next to the town itself. Jocks final idea before he had to scoot. It turned out to be a good one despite a Mechanised Scout unit, equipped with a number of Pumas, turning up nearby a turn later.
Bunker Assault

Despite have a load of artillery pointed at it it seems that the only way to take such a position in the rules is to assault it with infantry. Used some mortars to put smoke onto it to restrict its range of fire. For indirect artillery you need to make a targeting roll each turn even if targeting the same position as well as rolling for effect; which is something I found strange.
Fight in Town

The Bazooka equipped Americans deal with the Pumas and advanced into town. They seize control of one of the suburbs, and enter into a prolonged exchange with the Germans across the square who were now reinforce with a Jagdpanzer.
Bunker Busted

The Brits finally took out the bunker holding up the forces at the first bridge. A rear assault did the trick. With that out of the way they quickly advanced into close combat with the enemy in the buildings either side of the road and seized control of the first bridge.
Tank Attack

The German Tanks finally turn up retreating from the collapsed front line. They initially advance towards the first bridge and cause panic amongst the light artillery who mount up and move away. A few turns later the pursuing British armour arrive and the Panzers decide to turn and face them; much to the relief of the Paras who only have P.I.A.T.s to stop them. The game was winding down at this point so we decided to try out the Aerial Ground attack rules and sent in a Typhoon which successfully took out a panzer with its rockets.

Sunday, 28 December 2008
Furness Warlords
A little bit of history on one of the clubs that preceded the Furness Wargamers. This gaming club existed for a few years in the late 80s and early 90s and had quite a migratory existence. It started off as a semi-breakaway from the Penisular Wargames Society, apparently due to the number of junior players spoiling things there.
There was a large number of sixth formers involved in this group at the start and this was my entry point to the club having never been to the Peninsulars despite having friends that did. Of course the number of students eventually dwindled as we went on to university etc. but the club maintained a reasonable number of members into the 90s.
Initially based upstairs at the Red Cross Shop in Duke Street it lasted here for about a year. I had the unofficial role of doorman, having to run down the stairs whenever the doorbell rang to open the backdoor. With two reasonably sized rooms and a storage area on the 2nd floor, this was possibly the best place the club was ever at. At this time the games played was almost an equal split of Wargames, Boardgames and RPGs, with everyone doing a bit of everything.
It then moved quite a distance to the then recently renovated Holbeck Community Centre near Crofters, but local residents complained about the noise (I'm not joking! The buildings are now shut permanently, Holbeck Community being an oxymoron.) Then back to town and Storey Square, home of the Amateur Operatics, and rat infested. The club initially starting off in the Main Hall but then eventually relegated into the basement. Probably the strangest incident to happen there was when we entered the building one day to find the place decked out with swastikas. Fortunately it was just the singers preparing the scenery for a production of Cabaret and nothing more sinister!
And this is where the club stayed, heading more and more to the boardgame\cardgame side of things and dwindling in members till it folded. I had gone to live down in Bolton while doing a postgrad course, and by the time I returned the club was no more. That effectivly ended my involvement with 'club' gaming for a number of years.
The final legacy of the Warlords was the chipboard 'tabletops', that the Furness Wargamers managed to somehow inherit, but which were left behind at the Railway Club when we moved to the Baptists.

Monday, 22 December 2008
Gothic Horror
An ancients game at Matt's using the Fields of Glory rules. Set in the Eastern Roman Empire prior to the battle of Adrianopole in the Gothic War.
Fritigern's Goths vs the Roman governors, Lupicinus and Maximus, with the Barbarians having the overwhelming weight of numbers. The armies were not points based so no idea who had the advantage if any. The Romans certainly weren't first rate troops. Very few units were good enough to qualify for re-rolls.
The town to be defended. A haven of peace and slaves in the Danube region.
 |
| From Goth-Roman |
The initial deployment. The Romans refused the left as that is where their weakest units were deployed. The idea being that the weak point is closest to where the reinforcements were due to appear.
 |
 |
The Romans push their right forward. Since this was their best units they needed to make contact with the enemy A.S.A.P. The Goths themselves were only tentativly moving forward (Trying to reach optimum charge range). The Roman skirmishers had already withdrawn on the left.
 |
Both Leaders join in the front rank of the fight to try and break the stalemate. Leadership death rolls come close but no fatalities.
 |
Maximus and his cavalry finally arrive. (during turn 3 but took a lot longer to get anywhere)
 |
The Goths left flank finally breaks and the pursuit catches them. Fritigern is removed as his unit eventually get wiped out.
 |
Due to a number of snake-eyes the Goth Right also collapsed due to a rather weak cavalry charge. The Cavalry continues to pursue the broken Goths to make room for a flanking maneuver from the new units pushing up. Both Goth flanks are now gone.
The Goth centre manages to punch a hole through but the cavalry arrives just in time.
 |
Finally what remains of the centre comes under extreme pressure.
 |
And rather than carry on the massacre the game ends.

Saturday, 26 July 2008
Napoleonics - part 2
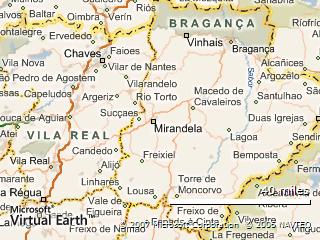
Thursday meet to finish of the game from previous Sunday. The French are still assaulting the Portuguese town of Mirandela.
The French failed to rally their troops in the centre. Many of them having already taken damage in the previous encounter at Braganca and were not eager to face any more after the failure of the initial attacks. The cascade effect on morale roles left the French Centre and Right totally void of Infantry.
The Spanish holding the village still came under persistent fire from a French battery, but with the aid of some musket volleys and counter battery fire from the neighbouring guns on the left they managed to inflict enough damage to dislodge the guns and with it remove the last immediate threat to the centre. The one British unit in the area then advanced out into the open to try and threaten the battery that was causing grief against the British line. This had some success as the guns had to redeploy to face towards the threatening troops.
A stalemate occurred on the left flank. The French Cavalry, once they had removed the remnants of the FGL and Spanish cavalry, refused to take on the squares of the Portuguese and Spanish infantry. The squares had also moved onto the other side of the hill in order to gain protection from the late arriving Horse Artillery, leaving any potential attacks by the cavalry unsupported.
The forces on the allied right continued to trade fire as the French attempted to weaken the British line with both Artillery and sorties by the Polish Lancers. Eventually the French committed two columns to plough into the line. One targeted at the British infantry, the second at a gun battery. Some quick support allowed the line to hold and forced that column to retire. The other column was more successful and managed to rout the battery. This column was too isolated to press the attack and so next turn, along with the rest of the French forces, withdrew.
And so both forces broke off to lick their wounds, and the game wound down to a close.
Tuesday, 22 July 2008
Napoleonics - part 1
A game arranged by Matt for Sunday Morning\Afternoon. Unfortunately the guest of honour (Kieron the Guardsman) that the game was arranged for, failed to turn up. This might of been because of his map reading skills or possibly a hangover. The game went ahead anyway.
A brief campaign set in northern Portugal as the French forces attempt to force a way over\around the river Droubo to Oporto. The rule set is 'In the Grand Manner', which I thought I had played in the past but I can't remember ever playing this version of it.
View Larger Map
After an initial (and very brief) battle at Braganca where a small force of Spanish Infantry attempted an holding action against the three encroaching French Divisions, both forces started to congregate around the middle of the map, as the Allies leading forces fell back to link up with additional units moving up from Oporto.
The few units of Allied Cavalry deployed on the far left flank with the Portuguese Infantry inside them on the left. The Spanish stayed lurking in the cover of the village, with the British line infantry holding the right. Most of the French cavalry lined up against our left, but the elite Polish Lancers (you could tell they were elite by the way they were painted!) were set up against our right as shock troops. Also against the British was the major thrust of the French Infantry assault with a large density of columns waiting to advance and engage.
The KGL and Spanish cavalry some how managed to beat the odds and had caused enough disruption in the French cavalry to stop them from effectively supporting the Infantry advance in the left and centre, with only a single isolated column managing to contact, and rout, some artillery. A few columns tried to advance against the centre but were repulsed before contact. The was also a shocked as the Poles were temporarily repelled, but they still bought the time needed for the attack columns to move into charge range, and charge they did.
So things are balanced with the Portuguese and Spanish holding the left flank and centre with a partial lull as the French reorganise, but with the British under immediate pressure from the columns of the French crashing down onto the right.
At this point we called it a day, but agreed to carry on the fight next week.
Subscribe to:
Posts (Atom)